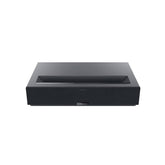
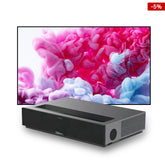
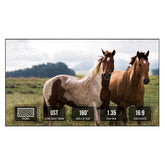
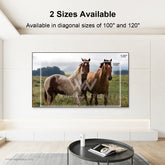
Effortless Setup: Get Your 120-inch Winways Fresnel Screen Up in 3 Simple Steps
Thinking About a Home Theater, but Dreading the Setup? You're Not Alone.
In Sydney and Melbourne’s high-rise apartments and family homes, more Aussies are turning to ultra-short-throw projectors for a cinematic experience — but projector screens often turn that dream into a DIY nightmare.
From aligning with studs and fiddling with laser levels to drilling into fragile plasterboard, traditional screen installation can easily cost you AU$300+ in professional help — or worse, a ruined wall and an unfinished weekend project.
The good news? With the Winways 120-inch ALR Fresnel Screen, you can skip the hassle and complete the entire setup solo in under 30 minutes. Here’s how.
Why Most Projector Screens Are a Pain to Install
| Step | Traditional Screens | Common Frustrations |
| 1. Measurement | Locate studs, level with precision tools | Need for laser level & stud finder |
| 2. Mounting Brackets | Manual alignment, multiple screws | At least 2 people + 1–2 hours |
| 3. Screen Setup | Align & lock-in frame | Misalignment = re-drilling risk |
Traditional ALR screens often require hours of alignment, heavy-duty drilling, and expert-level tools. With Winways Screen, setup is simplified into just 3 easy steps — no measuring tape, no stress.
The Winways Difference: Install with Confidence, Not Complication
With its pre-assembled magnetic rail, error-tolerant mounting system, and tool-minimalist design, the Winways Fresnel Screen eliminates common DIY pitfalls.
🔧 3-Step Setup Process (No Level Required)
1. Frame It
Snap the screen’s inner frame together — just align, click、and tighten a few screws. No measuring or technical skills needed.
2. Attach the Screen
Lay the screen flat, slide in the support rods along the edges, and hook it gently into place. No stretching or tricky adjustments.
3. Finish & Mount
Add the sleek outer frame, tighten the final screws, and you’re done. Two people can finish everything in under 30 minutes.
💡 Everything’s included in the box — even gloves and guide. Just bring a screwdriver and a friend.
✅ Pro Tip: Always flip the screen with two people for better control and to protect the material during setup.
Designed for Aussie Homes & Lifestyles
| Home Scenario | Winways Feature | Real-World Benefit |
| Small living rooms | 22cm wall clearance with UST compatibility | Big screen in tight space |
| Kids & Pets | Anti-impact screen + soft frame edges | Safer for families |
| Older buildings | Wall anchors for sandstone/plaster compatibility | Secure mounting without damage |
Why It Matters: Save Time, Stress, and Money
- Save $300+: Avoid hiring installation help
- Gain 90 mins: Compared to 1.5–2 hour average installs
- Minimize Tools: Only 1 screwdriver vs typical 3–4 tools
- Reduce Risk: ±5cm mounting tolerance prevents misdrilled holes
Final Thoughts: Set Up Once, Enjoy for Years
The Winways ALR Fresnel Screen isn't just about image quality — it’s engineered for the DIY home theater dreamer who wants the satisfaction of doing it themselves, without the stress.
With smarter mounting and real-world Aussie design thinking, you're not just saving on labor — you're investing in long-term peace of mind.
✅ Ready to Upgrade Your Setup?
👉 Order your 120-inch Winways ALR Fresnel Screen today
🎁 Bonus: Ships with full Aussie-compatible mounting kit + step-by-step install guide


