FK Series Fresnel Screens: AU Install & No-Crease Tips
FK Series Fresnel Screens: AU Install & No-Crease Tips
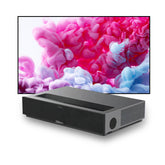
FK Series Fresnel fixed-frame screens are built for ultra-short-throw (UST) laser projectors and indoor use, using a multi-layer optical film that rejects ambient light for higher contrast and colour. This guide uses FK-120 as the example model for measurements, but the installation steps apply across the FK range; only the packing list and exact dimensions/hole spacings change by size.
Scope across FK series
Same steps for FK-100/120/150 etc.: assemble inner frame → prepare screen & thread rods → hook screen to inner frame → fit outer frame → wall layout & drilling → hang and fill frame.
What varies: parts lengths/quantities and model-specific sizes/holes—follow your box contents and spec sheet.
Before You Start (FK-120 example)
- Frame size: image 2656 × 1493 mm (16:9); frame 2688 × 1525 mm; thickness ~28.9 mm
- Weight: net 17 kg—ensure the wall can be drilled and safely support the load (>50 kg)
- Compatible with: UST (laser TV) models that meet the throw-ratio requirement
Aussie tool list: Phillips screwdriver, tape measure, spirit level, pencil, drill with 8 mm masonry bit, and two people for lifting. On Gyprock, locate studs or use rated heavy-duty anchors appropriate to your wall type.
What’s in the box (varies by model): inner/outer frame sections & joints, centre vertical rods, fibreglass poles, tie rods, wall brackets, expansion screws, M4 screws, plastic rivets, gloves, dust-free cloth, manual—check contents before starting.
Trust tip: Take clear photos immediately after unboxing as a condition record.
Step-by-Step Installation (Universal for FK series; FK-120 sizes shown)
1) Assemble the inner frame
Lay the dust-free cloth on a clean, flat surface. Unfold the two inner-frame halves, slide the long-slot section, then tighten; fix corners with M4×8 screws. Flip the frame, install the two centre vertical rods, and lock with plastic rivets. Lift only from the short edges (two people).
2) Prepare the screen surface
With gloves on, unroll the screen on the cloth and inspect. Do not sharply bend corners. Thread fibreglass rods along all four sides (long rods on the wide edges), then thread the tie rods likewise.
No-Crease Rule: why you must not fold the centre film
The FK panel is a multi-layer optical film with a Fresnel structure. A centre fold causes permanent creases, layer delamination and non-uniform gain, which show as bands/warps and are typically irreversible. Installation damage like creases or reversed film is not covered by warranty. Use a two-person slow flip from the wide edges—never “book-fold” the middle.
3) Hook the screen to the inner frame
Centre the inner frame on the screen’s back. Flip the tie rods so each hook aligns with the inner-frame buckle. Lock short sides first, then long sides (buckles can rebound—press firmly).
4) Fit the outer frame
Insert all outer-frame pieces into their slots without tightening—long sides first, then short. Once seams align, tighten the corner screws and then the rest.
5) Wall layout & drilling (FK-120 reference)
- Project a rectangle on the wall to mark position; confirm bottom width DL = 2656 mm is level
- Mark A1/L1/A2/A3 and B2/B3 as per the diagram for six holes
- Drill 6 × Ø8 mm holes to ≥65 mm depth and insert expansion screws
- Hang the screen by engaging the top edge into the bracket, tilt outward ~3°, then settle gently. Adjust bracket holes if height needs a tweak
6) Final checks
Power on the projector and confirm the image fills the screen with clean edges; re-position brackets if required.
Care & Everyday Use
- Clean with a lint-free soft cloth (you may lightly dampen with alcohol); don’t touch with hard objects and avoid direct sunlight
- Designed for indoor use; bright rooms are OK, but not outdoor sun
Warranty & Support
- Standard warranty: 12 months from purchase; extended warranty optional within the standard period
- Not covered: non-manufacturer parts, installation errors (e.g., creases, reversed film), unauthorised repair/mods, force majeure, missing proof of purchase
- Process & timeline: contact support → initial diagnosis → ship for repair if required; typical repair time 5–10 business days after receipt. Support: info@winways.com.au
Quick FAQ
Will it work with my UST laser projector?
Yes—FK screens are developed for UST projectors that meet the throw-ratio requirement.
What mistakes cause damage?
Lifting from the middle seam/centre rods, folding the centre film, or drilling without following the layout chart.
Any wall advice for Aussie homes?
On gyprock, find studs or use rated anchors; on brick/block, use appropriate masonry anchors. Always meet the >50 kg load guidance.


